When we are working with SQL we often need a temporary place to store our data for making further queries to get just the right data. To do this we can use something called SQL Views.
The great thing about SQL Views is that you are able to pick data from several tables and then join these data one more time with other tables stored in your database. By the end of this article, you will be able to create new SQL Views, update them and insert new data into them.
What are SQL Views?
You can think of a SQL View as a virtual table. This new virtual table can show our selected data and be joined with extra fields from other tables. Selected data from other tables, will be stored just as we know it from a regular query. The data is shown inside rows with columns from your select statement. The difference is that the rows do not exist in the database – they are virtual.
How to create a SQL View?
It is very easy to create a new SQL View. Below is an example of how to create a new view in your Microsoft SQL database.
CREATE VIEW <Sql_View_Name> AS
  SELECT Col1, Col2 FROM TableN
  WHERE <Your_Condition>
Let’s take a look at how this would work out in real life with some read data. First, we have to create a new table.
(demo) – Create a new table
This is just a simple table to hold some data about movies. It is really simple and there are no relations to other tables.
CREATE TABLE "Movies"
(
    Id UNIQUEIDENTIFIER NOT NULL PRIMARY KEY default NEWID(),
    Title varchar(80),
    Description varchar(250),
    Rating int
);
(demo) – Insert data into the new table
In order to show how to create a new view and select some data that will be presented in the view, we have to add some data. These will be a few records just for demo purposes.
INSERT INTO Movies VALUES (default,'Top Gun: Maverick','After more than thirty years of service as one of the Navys top aviators, Pete Mitchell is where he belongs, pushing the envelope as a courageous test pilot and dodging the advancement in r...',9);
INSERT INTO Movies VALUES (default,'Thor: Love and Thunder','Thor enlists the help of Valkyrie, Korg and ex-girlfriend Jane Foster to fight Gorr the God Butcher, who intends to make the gods extinct.',7);
INSERT INTO Movies VALUES (default,'Elvis','Elvis in Baz Luhrmanns biopic of Elvis Presley, from his childhood to becoming a rock and movie star in the 1950s while maintaining a complex relationship with his manager, Colonel Tom Park..',8);
INSERT INTO Movies VALUES (default,'Minions: The Rise of Gru','The untold story of one twelve-year-olds dream to become the worlds greatest supervillain.',7);
INSERT INTO Movies VALUES (default,'Amsterdam','Set in the 30s, it follows three friends who witness a murder, become suspects themselves, and uncover one of the most outrageous plots in American history.',5);
INSERT INTO Movies VALUES (default,'Doctor Strange in the Multiverse of Madness','Doctor Strange teams up with a mysterious teenage girl from his dreams who can travel across multiverses, to battle multiple threats, including other-universe versions of himself, which thre...',7);
Create the movie view
With the data in our database, we are now ready to create a new SQL View to showcase our movie data. This is done as below:
CREATE VIEW Movie_View AS
  SELECT Id, title, description, rating FROM Movies
  WHERE rating > 7
Let’s call our newly created SQL View named Movie_View using the following query: select * from movie_view.

Great! We got our view as expected. This is returning movies with the columns we have decided to include in the view. What if we would like to change what columns are included in our SQL View without having to delete them? It’s easy – we can simply perform an UPDATE of our SQL View.
Update your SQL Views
It is not possible to update a SQL View with more than one view (just a head up). Below is the syntax for updating an already existing view:
ALTER VIEW <Name_Of_View> AS
  SELECT Col1, Col2, Col3 FROM TableN
  WHERE <Your_Condition>
Below is the SQL code for updating the already existing view we created before to show our movies in the demo table.
ALTER VIEW Movie_View AS
  SELECT title, description, rating FROM Movies
  WHERE rating > 7
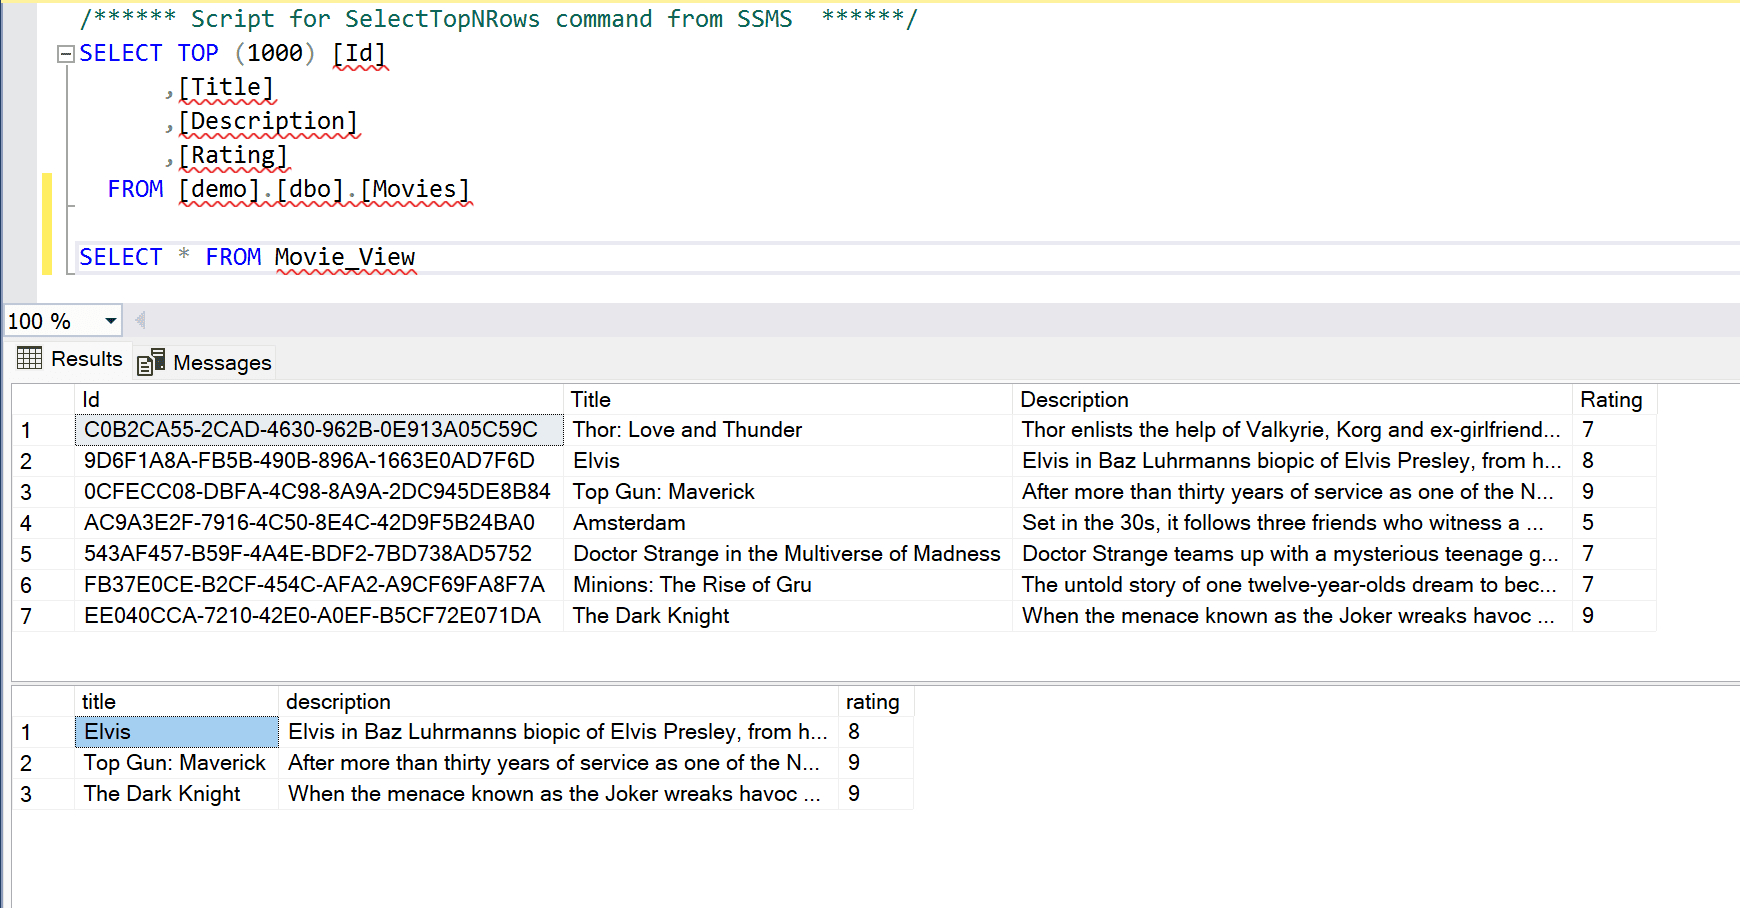
Let’s check the output of our ALTERED table in our SQL View.

Perfect! Our SQL View got updated and now only shows: the title, description, and rating. Just as we wanted it to. Let’s move on to the last part of this article where we will insert a new movie into the view.
Insert a new record into SQL Views
From time to time we have to insert new data into our views – not only select them (view them). In the code snippet below I have written the syntax for how to insert new data into a view.
INSERT INTO <Name_Of_View>(Col1, Col2, Col3)
  VALUES(Val1, Val2, Val3);
To insert a new movie into our previously created SQL View, we can execute the following SQL code:
INSERT INTO Movie_View(title, description, rating)
  VALUES('The Dark Knight','When the menace known as the Joker wreaks havoc and chaos on the people of Gotham, Batman must accept one of the greatest psychological and physical tests of his ability to fight injustice.',9);
Let’s select all records in our view to verify that our new movie got added to the view.

Awesome! The movie data got inserted into our SQL View and is now a part of the table.
Summary
In this article you learned how to create, view, alter and add new data to your SQL Views. SQL Views are really simple to work with and give a lot of power in terms of modifying and altering data before processing them further in our other applications.
I hope you learned something new or had your problems solved. If you got any questions, please let me know in the comments. Thank you for reading – until next time, happy coding!
Resources

