Azure is offering a dedicated communication service to send emails on a large scale. This tutorial will walk you through sending thousands of emails using Azure Communication Services with .NET.
In one of my earlier .NET tutorials, I showed you how to send emails using Microsoft Graph in .NET. You can read the article/tutorial at the link below. It will show you a way to send emails using the Microsoft Graph API as an alternative to the deprecated SmtpClient by Microsoft.

Microsoft Graph is working perfectly and it's free at the same time for all organizations using Office 365. The only problem you could encounter is the sending limit. Microsoft Graph only allows for sending 10.000 emails a day. This could be a problem for many organizations that would like to send newsletters, notifications, etc... To solve this problem Azure made a solution, it's named Azure Communication Services.
If you are ready, then let's configure a new service in Azure to send emails on a large scale using Azure Communication Services with .NET.
Configure Azure
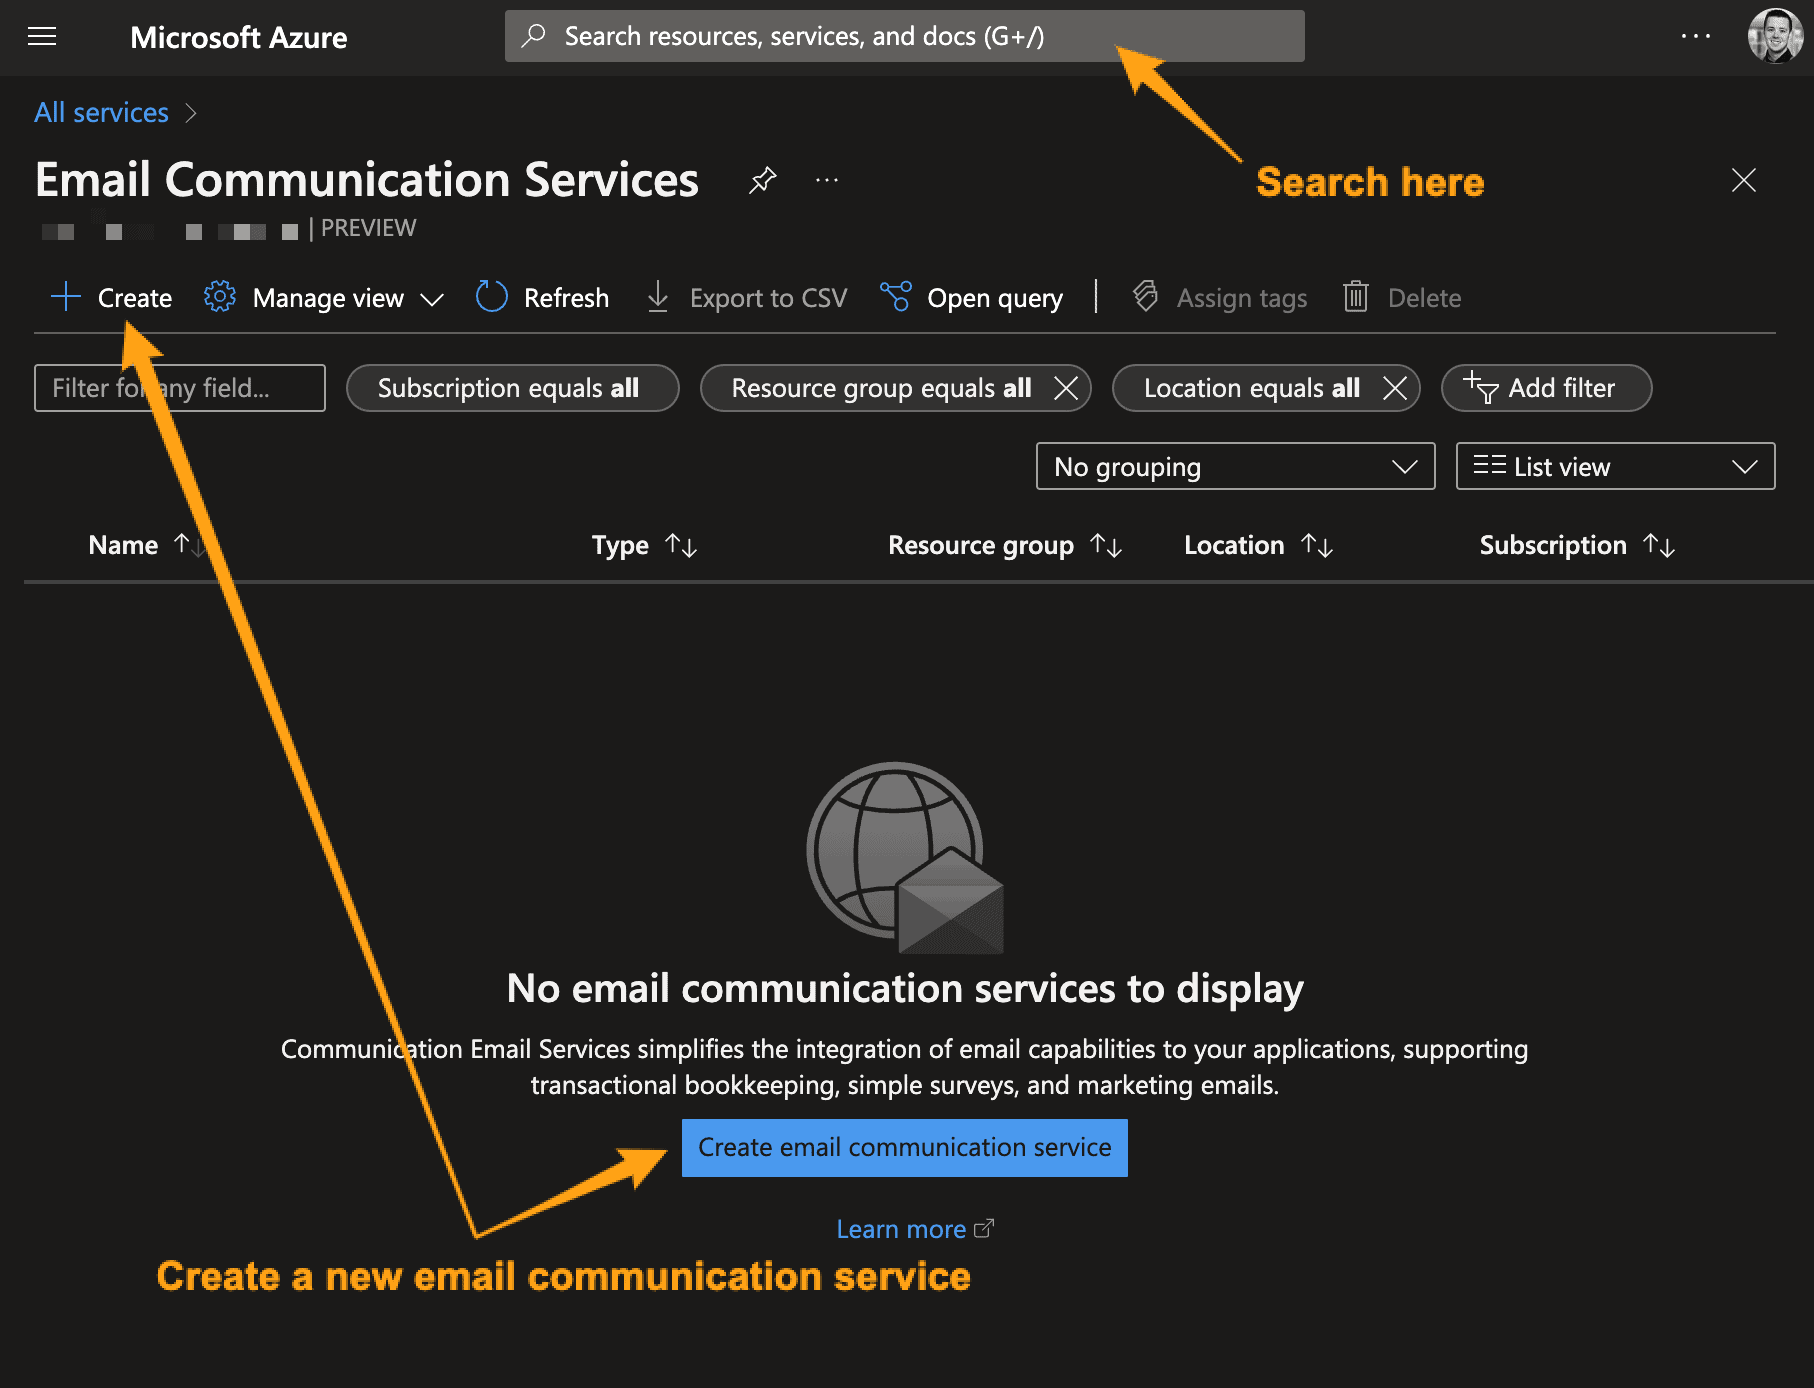
The first thing, we have to do is create a new Email Communication Service through the Azure Portal. You can do this by opening up your Azure Marketplace and searching for "Email Communication Services". Click on "Create Email Communication Service".
Fill out the required details for your resource, as I have done below, just with your own details:

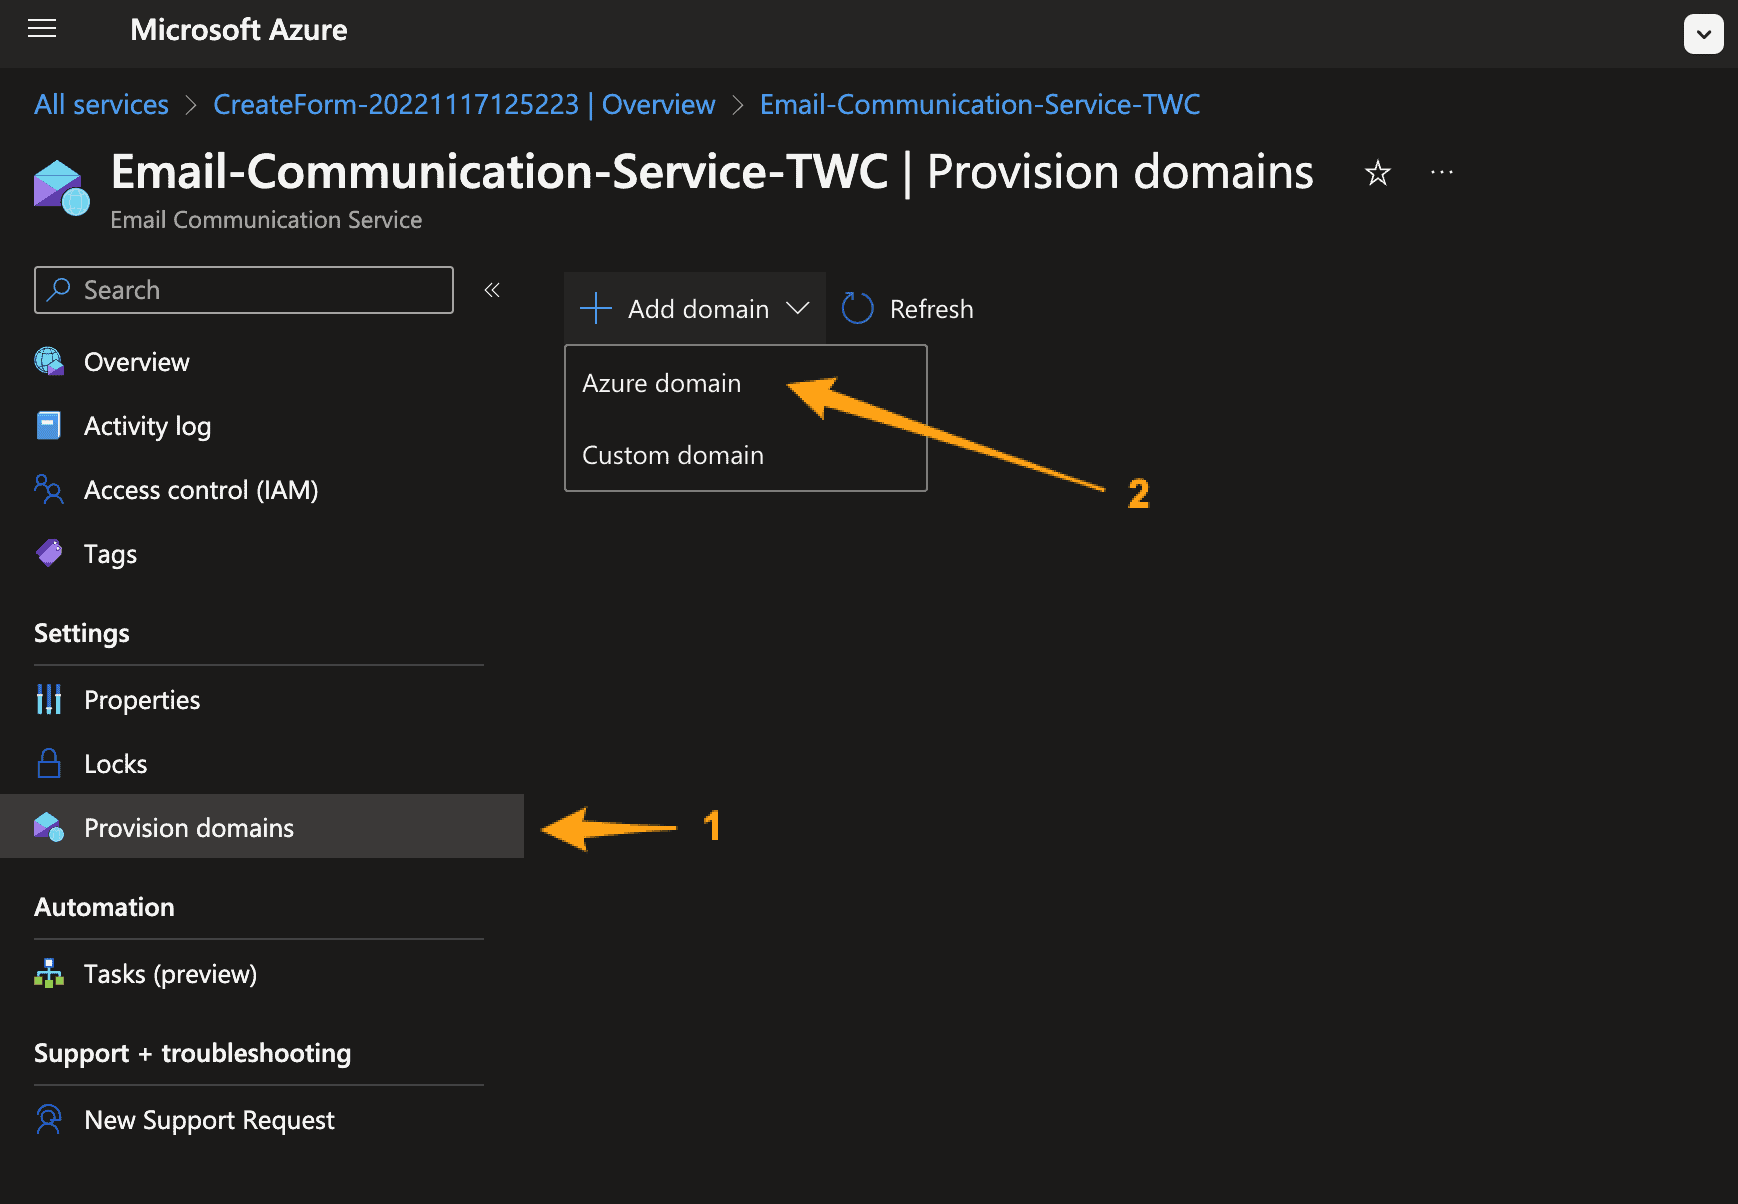
It will only take a few minutes for Azure to deploy your service. When it's ready to use, click it and configure a sender domain for the service. This is done under Provision domains -> Add domain -> Custom domain, as shown below: