Working with IOptions<> in .NET for the configuration of the application. In almost any project or application you will have some kind of settings that would need to be configured and often changed depending on the environment you are running the application within. This could be user secrets, default settings, paths, etc…A very classic example is connection strings for our databases – we don’t want to share them.
Luckily for the developers using .NET or ASP.NET Core, the configuration part has been extended and enhanced over the past couple of years. We can now store settings in environment variables, user secrets, appsettings.json or custom settings files, or even a database. In .NET we can use strongly typed settings using the IOptions<> pattern.
I was working on a big API project the other day and was trying to bind several custom configuration classes, but it wouldn’t bind to my properties in the JSON files. The reason was that I forgot to register each configuration file at startup.
If you are ready to get started learning how to utilize the power of the IOptions<> pattern, then let’s get started.
An introduction to strongly typed configurations
When using .NET you don’t have a default way to retrieve AppSettings["Settings"]. When reading through the documentation at Microsoft, the recommended approach is to create a strongly typed configuration class(es) that matches sections of your configuration files.
public class SwaggerSettings
{
    public string Title { get; set; }
    public string Version { get; set; }
    public string Description { get; set; }
    public string TermsOfserviceLink { get; set; }
}
That would map to this inside swagger.json (a file we were create).
{
  "SwaggerSettngs": {
    "Title": "Demo API with IOptions",
    "Version": "v1",
    "Description": "This is a description loaded from the configuration using IOptions",
    "TermsOfserviceLink": "https://christian-schou.dk/"
  }
}
As you can see the class SwaggerSettings completely matches the configuration file. This makes it possible to set the properties in the configuration file in the strongly typed configuration class during runtime.
How to bind configuration to classes using IOptions
To get started, you have to create a new project built on the ASP.NET Core Web API Template in Visual Studio. I have named mine IOptionsConfigurationDemo, but you can name yours as you want, or simply add the code inside your current application.
For this project, we will create some properties to be loaded in Swagger, giving us a dynamic way to change the texts in Swagger depending on the environment we run the application within. I personally like to add a text in my title in Swagger indicating that I’m working on the development, staging, testing, etc… environment. This makes everything a bit more clear and avoids me from making accidental mistakes.
The first thing I did was create a new folder named Configurations within my root project. Inside that folder I have created two configuration new files named swagger.json and swagger.Development.json. I have also added a file named Startup.cs. Both configuration files contain the following JSON code:
swagger.json
{
  "SwaggerSettings": {
    "Enable": true,
    "Title": "IOptions Demo PROD",
    "Version": "v1",
    "Description": "A demo of how you can use IOptions to bind value of properties to strongly types classes in .NET",
    "ContactName": "Christian Schou",
    "ContactEmail": "chsc@christian-schou.dk",
    "ContactUrl": "https://christian-schou.dk",
    "License": true,
    "LicenseName": "MIT License",
    "LicenseUrl": "https://christian-schou.dk"
  }
}
swagger.Development.json
{
  "SwaggerSettings": {
    "Enable": true,
    "Title": "IOptions Demo DEV",
    "Version": "v1",
    "Description": "A demo of how you can use IOptions to bind value of properties to strongly types classes in .NET",
    "ContactName": "Christian Schou",
    "ContactEmail": "chsc@christian-schou.dk",
    "ContactUrl": "https://christian-schou.dk",
    "License": true,
    "LicenseName": "MIT License",
    "LicenseUrl": "https://christian-schou.dk"
  }
}
In order to be sure these configuration files are loaded and bound to my SwaggerSettings class, we have to do two things.
- Set up the
ConfigurationBuilderto load the files at runtime. - Bind our
SwaggerSettingsclass to a configuration section.
By default, this .NET template will contain logic for configuring OpenAPI/Swagger in Program.cs. Also ConfigurationBuilder has already been configured to load default settings in appsettings.json from our environment variables.
Add configuration files to the host builder
Let’s add our own configuration extension to the host part of Program.cs. Inside Configurations we created a file named Startup.cs, let’s add some code in that file. Remember to change the namespace, if you are copying the code directly.
namespace IOptionsConfigurationDemo.Configurations
{
    internal static class Startup
    {
        internal static ConfigureHostBuilder AddConfigurations(this ConfigureHostBuilder host)
        {
            host.ConfigureAppConfiguration((context, config) =>
            {
                const string configurationsDirectory = "Configurations"; // Path for pickup location of configuration files
                var env = context.HostingEnvironment; // Get current hosting environment

                // Application Specific Configurations
                config.AddJsonFile("appsettings.json", optional: false, reloadOnChange: true)
                    .AddJsonFile($"appsettings.{env.EnvironmentName}.json", optional: true, reloadOnChange: true)
                    .AddJsonFile($"{configurationsDirectory}/swagger.json", optional: false, reloadOnChange: true)
                    .AddJsonFile($"{configurationsDirectory}/swagger.{env.EnvironmentName}.json", optional: true, reloadOnChange: true)
                    .AddEnvironmentVariables();
            });
            return host;
        }
    }
}
A brief explanation of the code above.
- First, we create an extension of
ConfigureHostBuilderand then we set up a remainder of the build process and application usingConfigureAppConfiguration. - We then load the configuration path and the current environment into a variable.
- Then we add each configuration file with its path and the options for it to load the configuration file in a specific environment defined by the env variable.
- Finally, we add the environment variables to the host and return the host to the requesting method.
Now we have to register the extension in Program.cs. This is done like below at line 7:
using IOptionsConfigurationDemo.Configurations;

var builder = WebApplication.CreateBuilder(args);

// Add services to the container.

builder.Host.AddConfigurations();
builder.Services.AddControllers();
// Learn more about configuring Swagger/OpenAPI at https://aka.ms/aspnetcore/swashbuckle
builder.Services.AddEndpointsApiExplorer();
builder.Services.AddSwaggerGen();

var app = builder.Build();

// Configure the HTTP request pipeline.
if (app.Environment.IsDevelopment())
{
    app.UseSwagger();
    app.UseSwaggerUI();
}

app.UseHttpsRedirection();

app.UseAuthorization();

app.MapControllers();

app.Run();
Bind configurations values to class
Now we have to bind the values of our configuration files to the class. Let’s create a new folder at root level named Settings and add a new class inside this folder named SwaggerSettings.cs. This is a mirror of the properties we added earlier in swagger.json just as a strongly typed class.
namespace IOptionsConfigurationDemo.Settings
{
    public class SwaggerSettings
    {
        public bool Enable { get; set; }
        public string? Title { get; set; }
        public string? Version { get; set; }
        public string? Description { get; set; }
        public string? ContactName { get; set; }
        public string? ContactEmail { get; set; }
        public string? ContactUrl { get; set; }
        public bool License { get; set; }
        public string? LicenseName { get; set; }
        public string? LicenseUrl { get; set; }
    }
}
Open the Startup class we created in Configurations again and add the following code to it (line 24-28):
using IOptionsConfigurationDemo.Settings;

namespace IOptionsConfigurationDemo.Configurations
{
    internal static class Startup
    {
        internal static ConfigureHostBuilder AddConfigurations(this ConfigureHostBuilder host)
        {
            host.ConfigureAppConfiguration((context, config) =>
            {
                const string configurationsDirectory = "Configurations"; // Path for pickup location of configuration files
                var env = context.HostingEnvironment; // Get current hosting environment

                // Application Specific Configurations
                config.AddJsonFile("appsettings.json", optional: false, reloadOnChange: true)
                    .AddJsonFile($"appsettings.{env.EnvironmentName}.json", optional: true, reloadOnChange: true)
                    .AddJsonFile($"{configurationsDirectory}/swagger.json", optional: false, reloadOnChange: true)
                    .AddJsonFile($"{configurationsDirectory}/swagger.{env.EnvironmentName}.json", optional: true, reloadOnChange: true)
                    .AddEnvironmentVariables();
            });
            return host;
        }

        internal static IServiceCollection AddConfigurationServices(this IServiceCollection services, IConfiguration configuration)
        {
            services.Configure(options => configuration.GetSection("SwaggerSettings").Bind(options));
            return services;
        }
    }
}
What did we just do?
- We start off by creating a new extension of
IServiceCollectionnamedAddConfigurationServicesthat takesIServiceCollectionandIConfigurationas parameters. - On line 26 we register a new action to configure an option of type
SwaggerSettings. We then instruct theConfigure()method to load the section namedSwaggerSettingsand bind theoptions(configurations) to that class.
Finally, we have to make sure that this extension is also loaded at startup in Program.cs. This has to be done after we have added the configurations and loaded them. Go to Program.cs and add the code at line 8.
using IOptionsConfigurationDemo.Configurations;

var builder = WebApplication.CreateBuilder(args);

// Add services to the container.

builder.Host.AddConfigurations();
builder.Services.AddConfigurationServices(builder.Configuration);
builder.Services.AddControllers();
// Learn more about configuring Swagger/OpenAPI at https://aka.ms/aspnetcore/swashbuckle
builder.Services.AddEndpointsApiExplorer();
builder.Services.AddSwaggerGen();

var app = builder.Build();

// Configure the HTTP request pipeline.
if (app.Environment.IsDevelopment())
{
    app.UseSwagger();
    app.UseSwaggerUI();
}

app.UseHttpsRedirection();

app.UseAuthorization();

app.MapControllers();

app.Run();
That’s it, now the properties in swagger.json will be bound to the strongly typed class at runtime. Now we only have to use the settings to configure Swagger/OpenAPI. For this, I have created a new folder named OpenAPI and added a new class file named Startup.cs.
Inside this new Startup.cs file we have to add a new variable that holds the values of our swagger settings. Because Swagger currently is registered in Program.cs and I want to keep my Program.cs file clean, we have to create an extension method that can be added to Program.cs that will contain all logic for adding Swagger to our application.
First, we have to install a new package named NSwag.AspNetCore in our project. You can do that by using the below commands or by searching it up in the NuGet Package Manager.
# Package Manager
Install-Package NSwag.AspNetCore

# .NET CLI
dotnet add package NSwag.AspNetCore

#PackageReference
<PackageReference Include="NSwag.AspNetCore" Version="VERSION-HERE" />
With that out of the picture, let’s create a new extension method to configure swagger with our new strongly types configuration class.
using IOptionsConfigurationDemo.Settings;

namespace IOptionsConfigurationDemo.OpenAPI
{
    public static class Startup
    {
        internal static IServiceCollection AddOpenApiDocumentation(this IServiceCollection services, IConfiguration configuration)
        {
            SwaggerSettings? settings = configuration.GetSection(nameof(SwaggerSettings)).Get<SwaggerSettings>();

            if (settings.Enable)
            {
                services.AddEndpointsApiExplorer();
                services.AddOpenApiDocument((document, serviceProvider) =>
                {
                    document.PostProcess = doc =>
                    {
                        doc.Info.Title = settings.Title;
                        doc.Info.Version = settings.Version;
                        doc.Info.Description = settings.Description;
                        doc.Info.Contact = new()
                        {
                            Name = settings.ContactName,
                            Email = settings.ContactEmail,
                            Url = settings.ContactUrl
                        };
                        doc.Info.License = new()
                        {
                            Name = settings.LicenseName,
                            Url = settings.LicenseUrl
                        };
                    };
                });

            }

            return services;
        }
    }
}- First, we create an extension method of
IServiceCollectionnamedAddOpenApiDocumentationwith two parameters for the service and configuration. - Next, we get the section of our configuration named the same as our settings class and load the settings into a variable of that model.
- Finally, we configure
OpenAPIusing the settings making theOpenApiDocumentdynamic depending on the environment that has been chosen.
Now we have to register this extension service in our Program.cs file. This has to be done after the configuration has been done in the pipeline. Please update the whole Program.cs file as I have done some housekeeping to remove the old Swagger implementation.
using IOptionsConfigurationDemo.Configurations;
using IOptionsConfigurationDemo.OpenAPI;

var builder = WebApplication.CreateBuilder(args);

// Add services to the container.

builder.Host.AddConfigurations();
builder.Services.AddConfigurationServices(builder.Configuration);
builder.Services.AddControllers();
// Add OpenAPI
builder.Services.AddOpenApiDocumentation(builder.Configuration);

var app = builder.Build();

app.UseHttpsRedirection();

app.UseAuthorization();

app.MapControllers();

app.Run();
If I were to launch the application now I would get a problem with the OpenAPI interface, as I have not told the pipeline to use OpenAPI and SwaggerUi3. Let’s go ahead and do just that. Inside the Startup.cs with OpenAPI add the following new extension, just below our previous service extension AddOpenApiDocumentation:
internal static IApplicationBuilder UseOpenApiDocumentation(this IApplicationBuilder app, IConfiguration configuration)
        {
            SwaggerSettings? settings = configuration.GetSection(nameof(SwaggerSettings)).Get<SwaggerSettings>();

            if (settings.Enable)
            {
                app.UseOpenApi();
                app.UseSwaggerUi3(options =>
                {
                    options.DefaultModelExpandDepth = -1; // Don't expand the schemas and endpoints
                    options.DocExpansion = "none";
                    options.TagsSorter = "alpha";
                });
            }

            return app;
        }
This one also has to be registered in Program.cs, but after the services are in place. Check line 18:
using IOptionsConfigurationDemo.Configurations;
using IOptionsConfigurationDemo.OpenAPI;

var builder = WebApplication.CreateBuilder(args);

// Add services to the container.
builder.Host.AddConfigurations();
builder.Services.AddConfigurationServices(builder.Configuration);
builder.Services.AddControllers();
builder.Services.AddOpenApiDocumentation(builder.Configuration); // Add OpenAPI

var app = builder.Build();

app.UseHttpsRedirection();

app.UseAuthorization();

app.UseOpenApiDocumentation(builder.Configuration);

app.MapControllers();

app.Run();
Let’s take it for a ride and see the result:

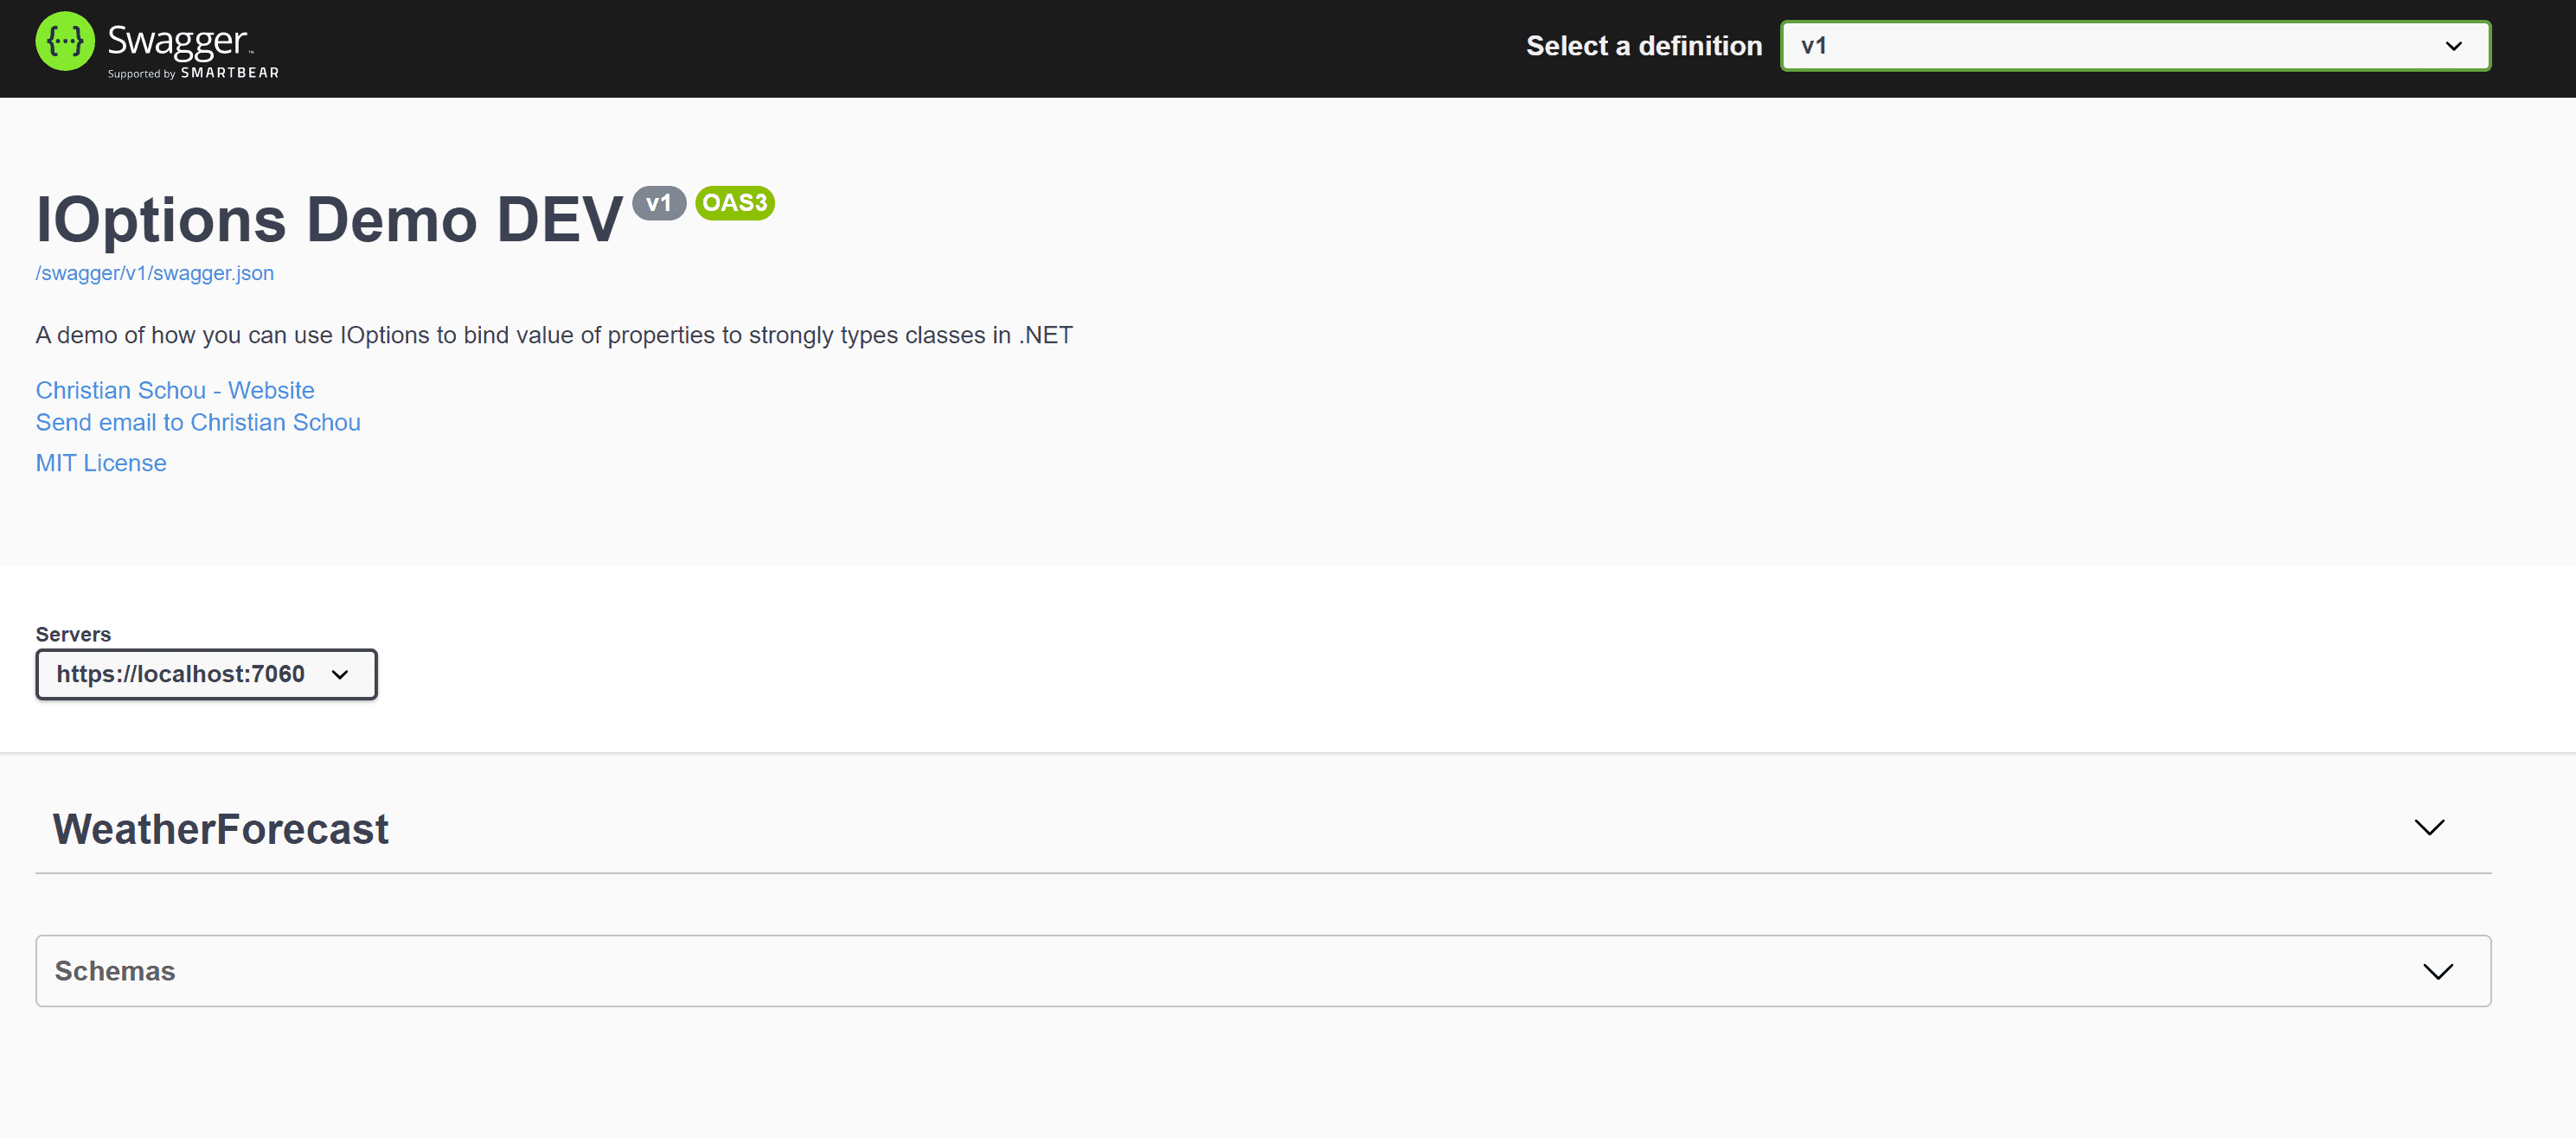
Perfect! We now see the DEV in the title just as expected. Let’s try and switch the environment to production and see what happens.

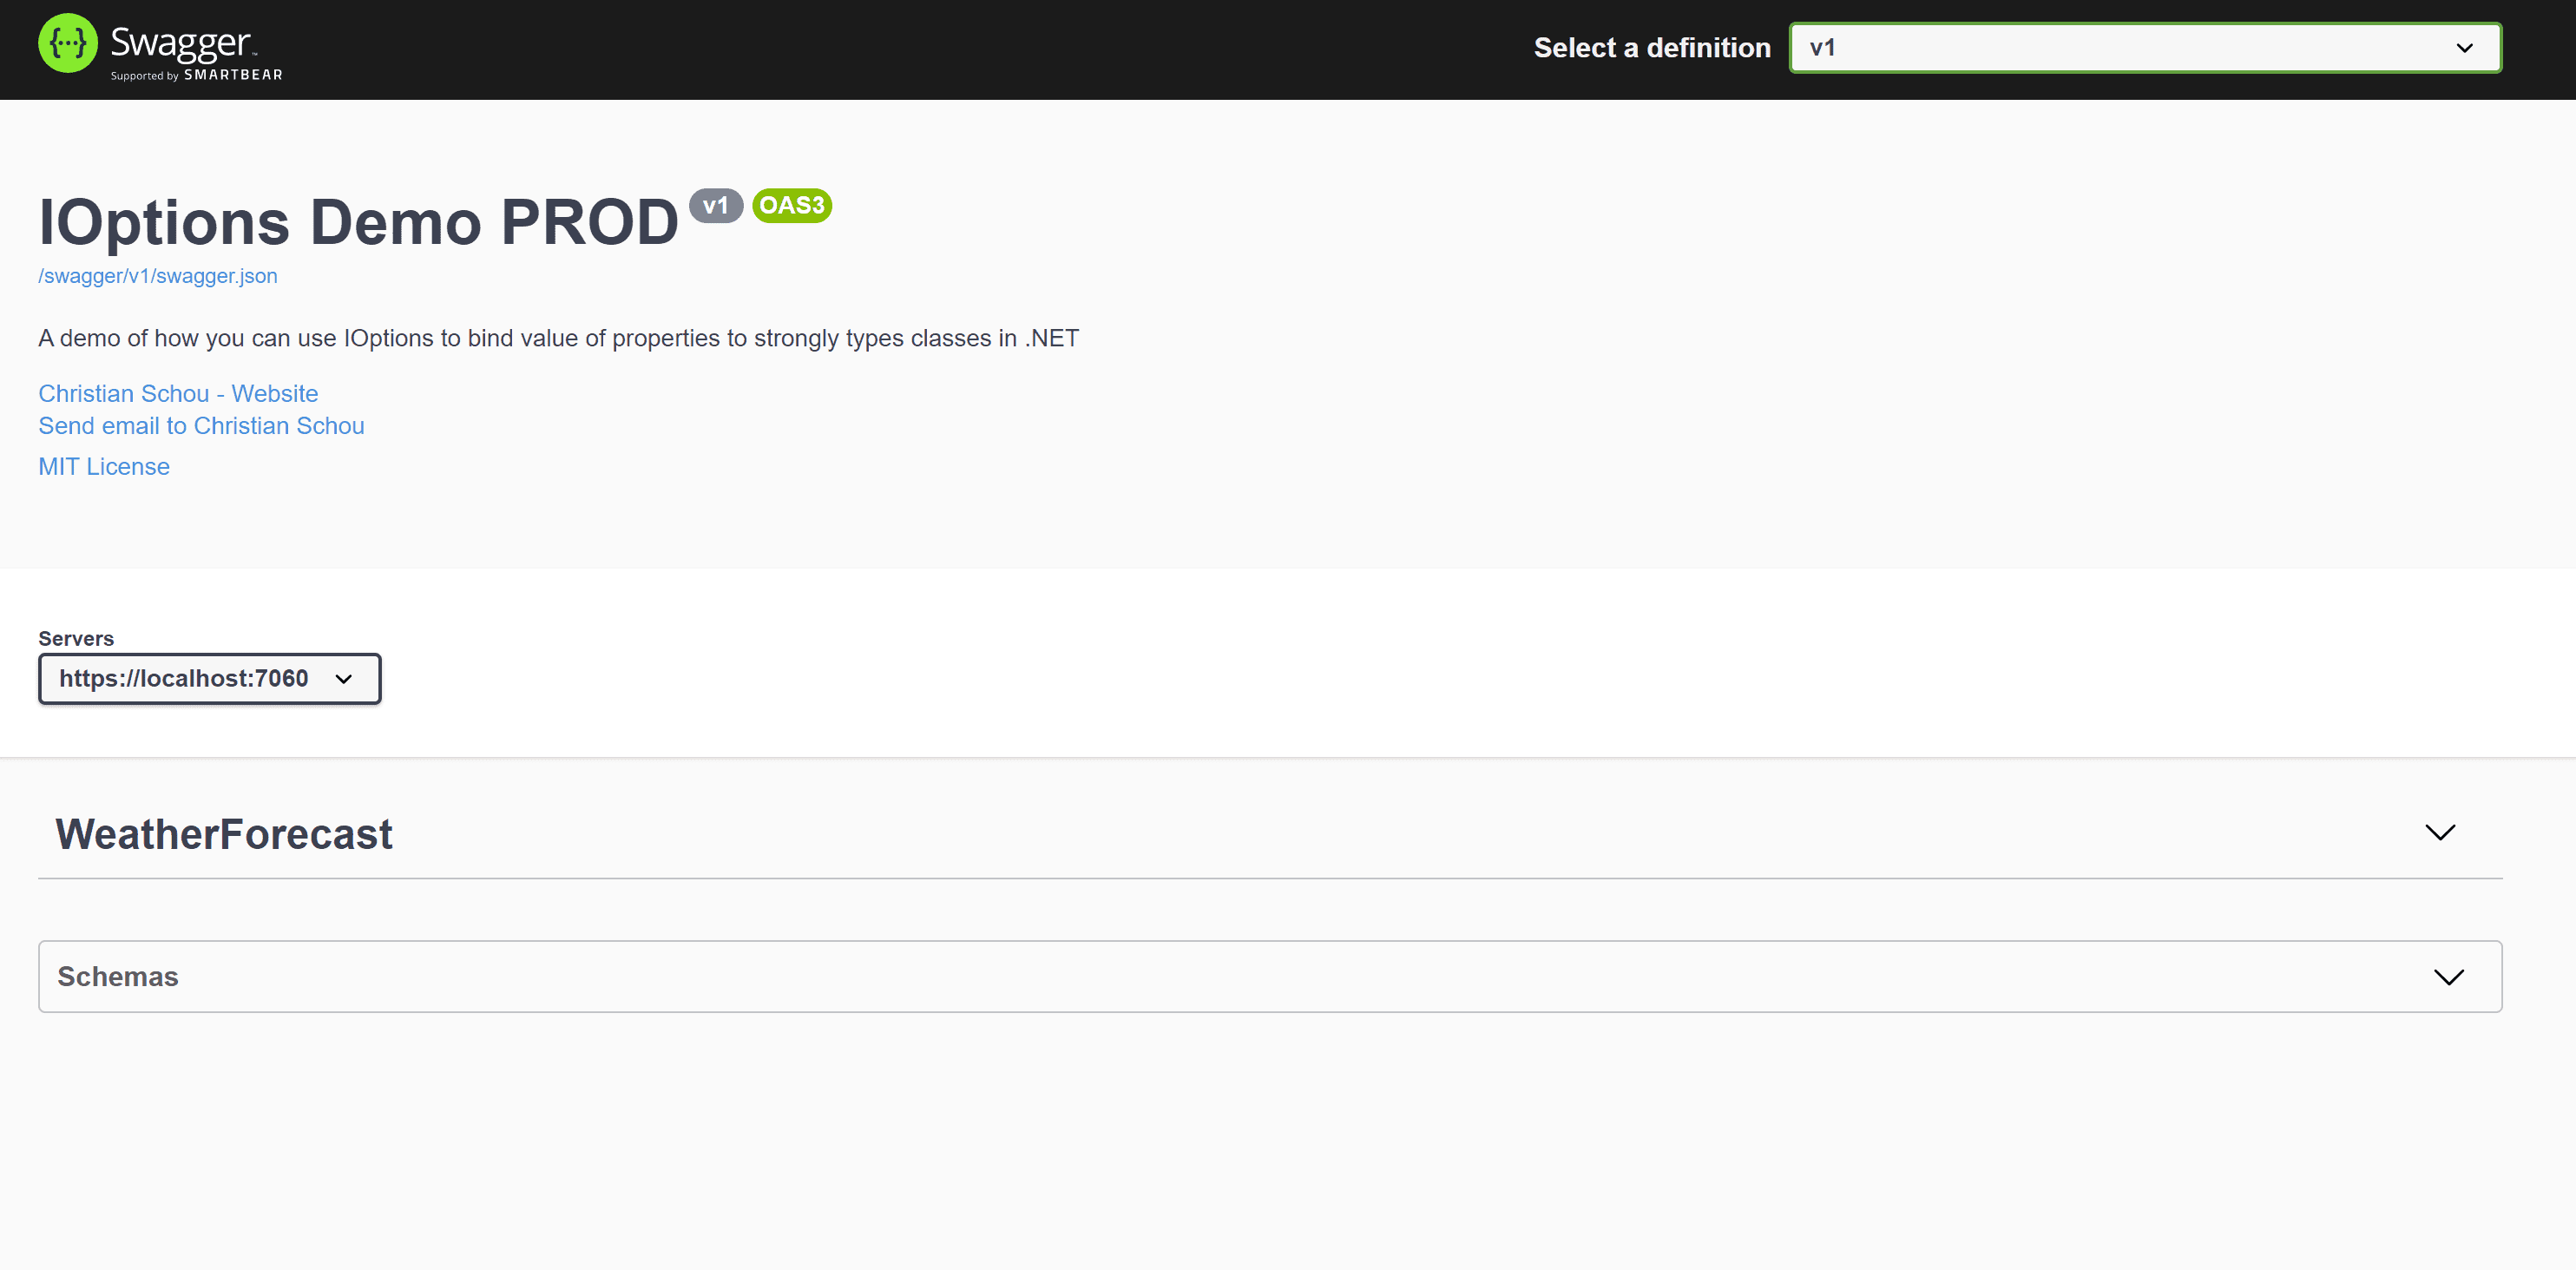
Awesome! Now we can change the value of our application dynamically just by having multiple config files. This makes life easier for us when deploying to different environments like testing, pre-prod, and prod.
Use Configuration Values from IOptions in a class or controller
If you want to, you could also do dependency injection to gain access to the settings values.
public class SomeController : ControllerBase
{
    private SomeSettings _settings;
    public SomeController(IOptions<SomeSettings> settings)
    {
        _settings = settings.Value
    }

    public string GetSettingsString()
    {
        return _settings.SomeString;
    }
}
That’s how easy it is to get access to the settings once the initial work has been completed in Program.cs.
Validate the configuration values
If you would like to validate your configurations at startup using the IOptions pattern, please check out my guide below.

Summary
Using the strongly typed configuration in .NET is a great way to work with settings. IOptions help us provide our application with a clean way to apply the Interface Segregation Principle to our configurations. When the configurations have been added one time in the service extensions you can use them throughout the whole application.
I personally use this way when I add configuration files to my applications and the settings are not stored in a database. If you got any issues, questions, or suggestions, please let me know in the comments below. Happy coding!
Repository
If you would like to have a look at the solution, you can check out the repository on my GitHub here:


